How to Use Todoist Effectively — The Complete Guide
Everything you ever wanted to know about using Todoist (and then some)

Whether you’re finalizing a massive team project, planning a more-work-than-expected event, or keeping track of when your bills are due, you’ve got goals.
The problem is, goals aren’t enough. You need a system to truly get things done.
That’s where Todoist fits in. At first, it’s simple: you add tasks and complete them. But over time, you’ll discover the many features that help you get things done — from scheduling weekly tasks, to setting reminders, to turning important emails into tasks.
Get started by browsing our complete guide to how to use Todoist and trying out new features in your daily workflow. Soon, you’ll find a combination of features that ensures you’re always working on the right things at the right time without missing anything important. That system forms the foundation for a more calm, organized, and productive life.
Before you start: Learn how Todoist works
You’ve got to walk before you run – get started with a quick overview of the basics:
If you haven’t already, create a Todoist account, log in, and start learning how to get things done every day by adding and completing tasks.
1. Get things out of your head by adding and completing tasks every day
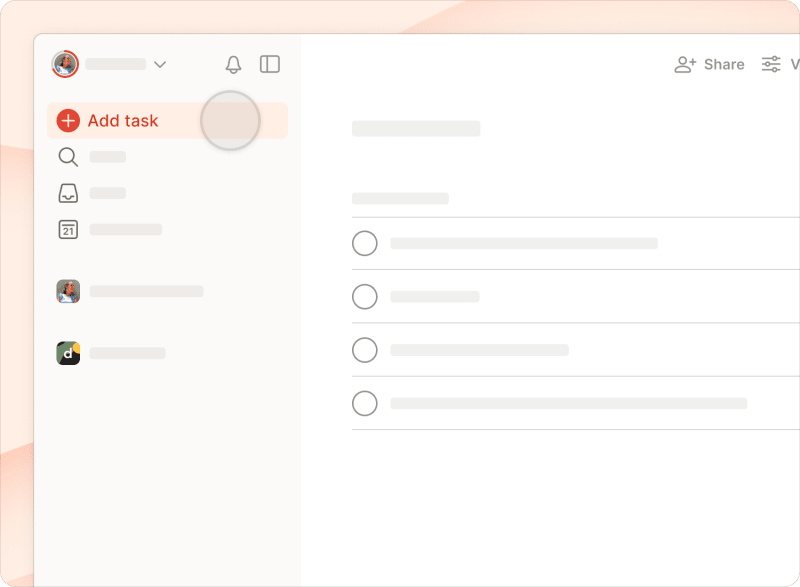
Start by getting all the tasks you’ve been worrying about off your mind and into Todoist, so you can focus on just what’s in front of you right now. To add a new task, simply look for and select the + on any platform. Then, type out the task name and press Add task to save it.
Make it a daily habit to add tasks to Todoist whenever you think of them on whichever device is closest. Build a habit of adding a task to Todoist in seconds.
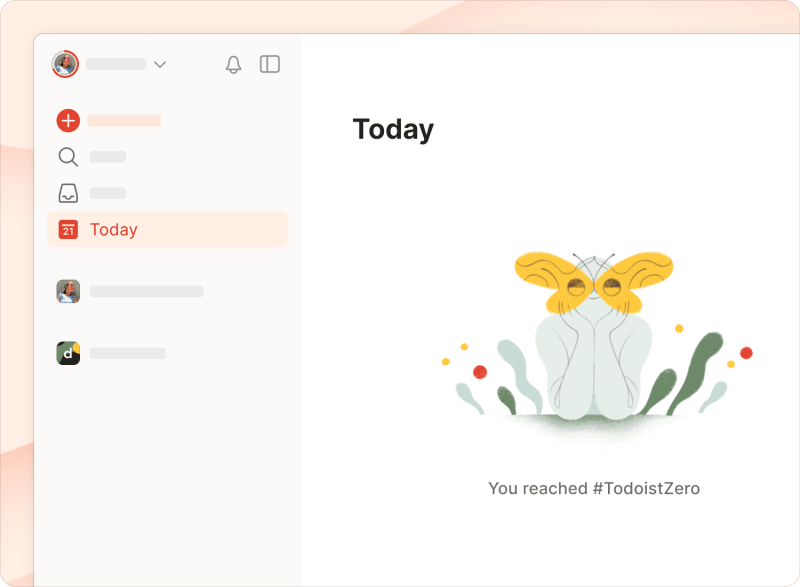
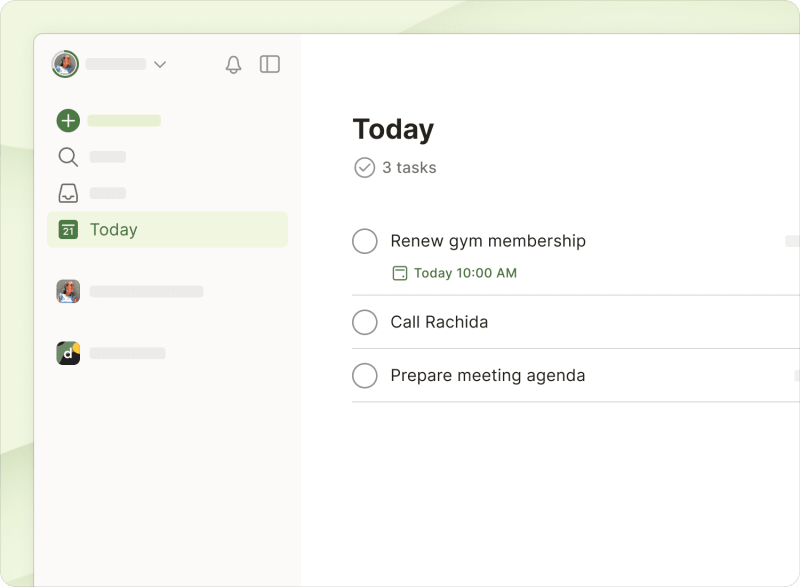
As the day goes on, review what you have to do using the Today or Upcoming view. Mark tasks as complete by clicking the circle to the left of the task or swiping the task from left to right on mobile. When you've completed all tasks in any given view, you'll see a screen like this to let you know you don't have any more tasks that day.
App callout note: Tip: If you complete a task by...
2. Stay on schedule by setting due dates and recurring due dates for your tasks
Instead of trying to do too much today, set future due dates for your tasks so you have the time to do your best work and hit important deadlines.
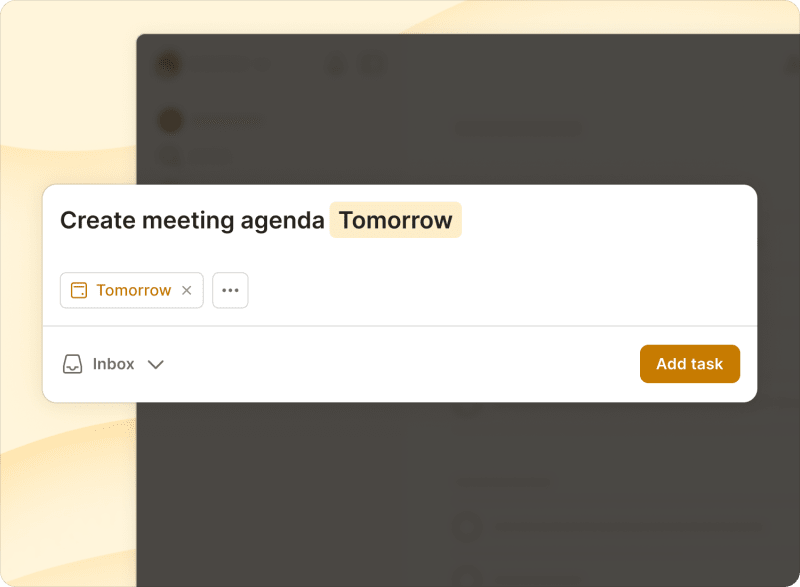
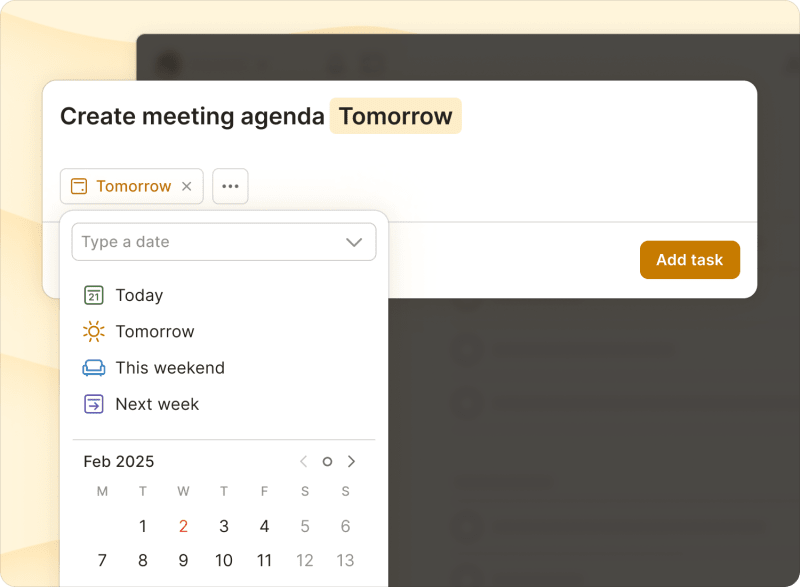
To give a task a due date, simply type the date into the task field using natural language. For example, today, tomorrow, June 15, or next Monday. You can also add a specific time like June 15 at 9am. Todoist will automatically detect the due date and add it to the task when you save it.
To more easily visualize your schedule, you can also pick a due date from a calendar. Just click or tap Date or the calendar icon when adding or editing a task on any platform. From there, you’ll be able to manually pick a date from the calendar, or use any of our handy date shortcuts like Today, Tomorrow, or Next week.
App callout note: Note: When picking a task’s due date...
Setting recurring due dates
Some tasks don’t happen just once — taking out the trash, writing a weekly status update, drafting quarterly reports, etc. Keep track of repeating tasks with recurring due dates.
To set a recurring due date, type the date into the task field using natural language just like you would for regular due dates. For example, every day, every Friday, every 3 days starting next Monday, and more.
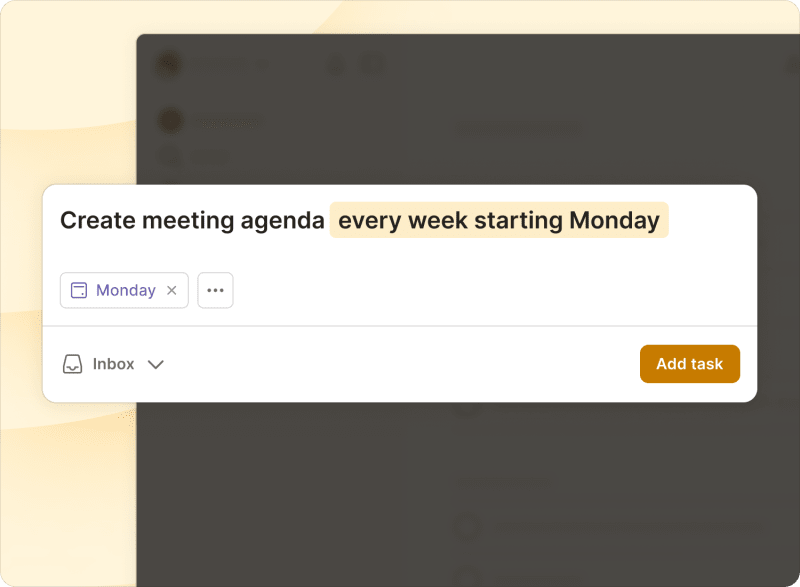
When you complete a recurring task, it will automatically reset to the next occurrence so you’ll never miss it.
Changing due dates
Plans change (more often than we’d like), and due dates need to be updated.
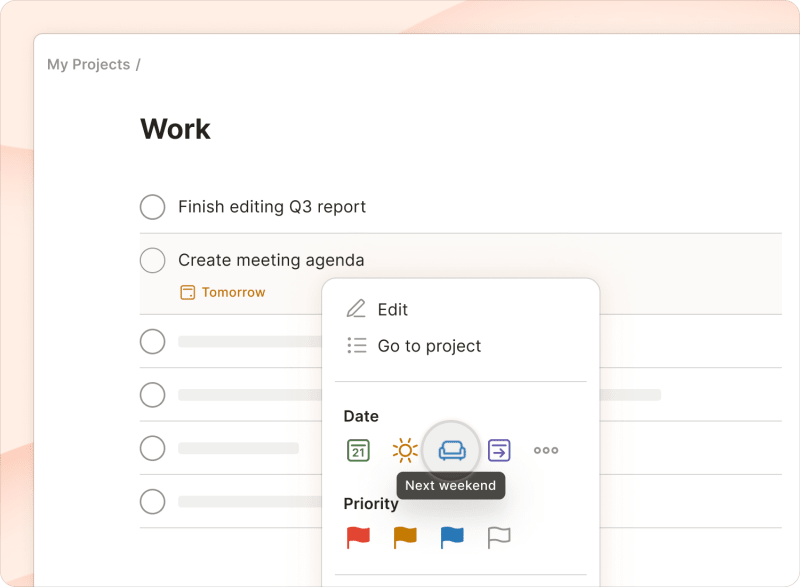
If you’re in a rush and want to postpone a task by a day or push it to next week, right click on a task (Web, Windows, macOS) or swipe right to left (iOS, Android) and use the Tomorrow or Next Week shortcuts at the top of the menu.
If you need to reschedule the task to a specific date, open the task scheduler and click/tap on the new due date in the calendar below. Hit the right arrow to see more dates.
Of course, you can also change the date by editing the task and simply typing a new date into the task field.
App callout note: 💡 Tip: To remove a task’s due...
Dig yourself out and reschedule all your overdue tasks in one go
When the tasks start to pile up, you may end up “snowballing”, endlessly postponing tasks by a day or week until you have an avalanche of overdue tasks.
Rebalance all your tasks in one go by clicking Reschedule in the top right of your Today or Upcoming view. You can also selectively reschedule a few tasks at a time. Simply select multiple tasks, click Schedule, and pick a date that is a little less hectic.

3. Split bigger tasks into sub-tasks
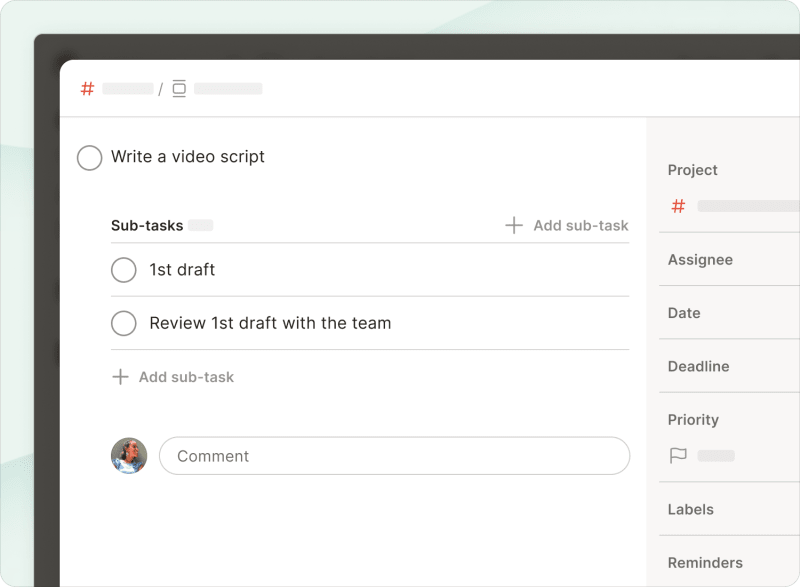
Don’t be afraid to divide a big, unwieldy task into smaller steps. For example, you’ll need plenty of little steps to take care of a task like “Write a video script.” Add sub-tasks for every step along the way to completing the bigger task.
You can add sub-tasks named 1st draft, 2nd draft, and Final draft. Breaking big tasks down into smaller ones makes it less daunting to get started, and checking things off along the way builds momentum to get to the finish line.
Open any task and click or tap Add sub-task. Then, use the steps above to add a due date for the sub-task. Repeat as necessary until you’ve added all the steps.
You can also create a sub-task by dragging and dropping a regular task underneath a parent task (Web, Desktop, Windows). For Android and iOS, long press on the task and drag it to the right, under the parent task.
Completing sub-tasks is just like completing normal tasks: Click the circle to the left (Web, Windows, macOS) or swipe left to right (iOS, Android). To help you visualize your progress, completed sub-tasks will stay visibly crossed out until the parent task is completed.
App callout note: 💡 Tip: If you want to hide...
4. Focus on the right things by setting task priorities
Okay, now you know what tasks you have to do and when to do them. Now you need to figure out which tasks to do first.
Eating the frog means staring down the hard, important tasks you have to do today and doing them first. You’ll start your day with some momentum and kill any chance to procrastinate.
In Todoist, mark your most important task with a red color by setting its task priority to p1. Your Today and Upcoming views will automatically sort based on priority, so your p1 tasks will always show up at the top. That way, you’ll always know which frog to eat at the start of your day.
Todoist offers four priority levels: 1 being the most important (marked as red) and 4 being everything else (no color). To set a priority, type “p” into the task field followed by the priority level you want, e.g., “Eat the frog p1.”
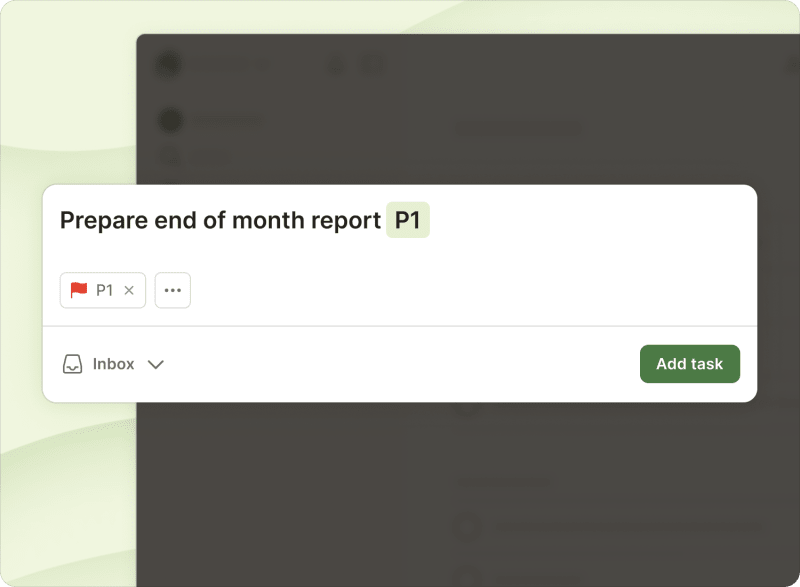
Alternatively, select an option from the Priority dropdown menu.
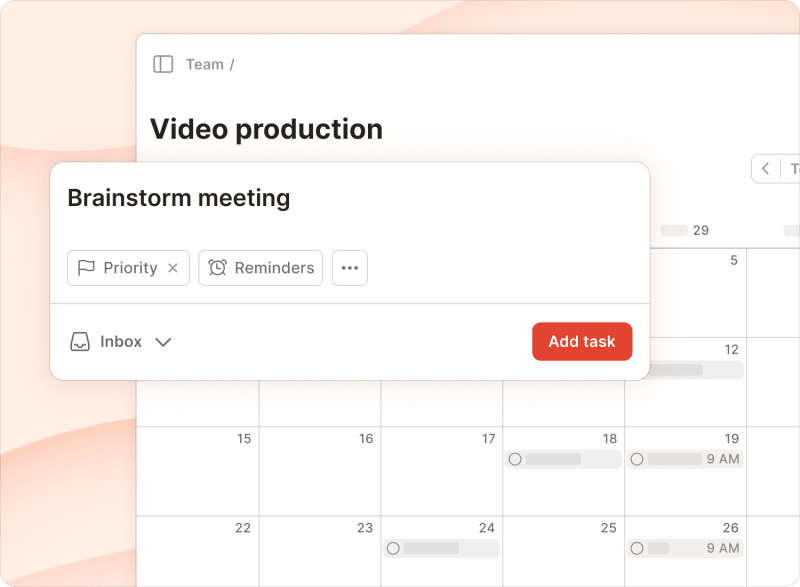
5. Never miss a thing by setting task reminders
What’s the point in using a task manager if you forget to finish important tasks? Fortunately, you can have Todoist send you a reminder by email or push notification when a task is coming up.
Automatic reminders
When you set a due date and time for a task, Todoist will automatically send you a reminder 30 minutes before the task is due (you can change the default reminder time in Settings > Reminders).
Manual reminders
When you absolutely can’t afford to miss a task, set manual reminders that will trigger at any time (or any place) you want.
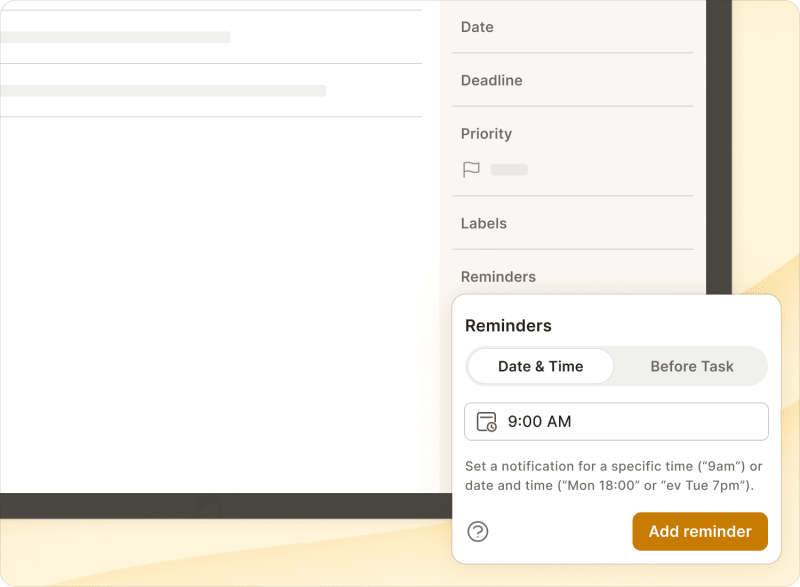
To set a reminder, click on the task, then select Reminders in the bottom right, and set a trigger for the reminder one of three ways:
Select the Date & time option to specify a date and time for the reminder, like “tomorrow at 10am”.
If your task has a due date and time, select Before task. Then, set a relative time for the reminder, like 1 hour before the task is due.
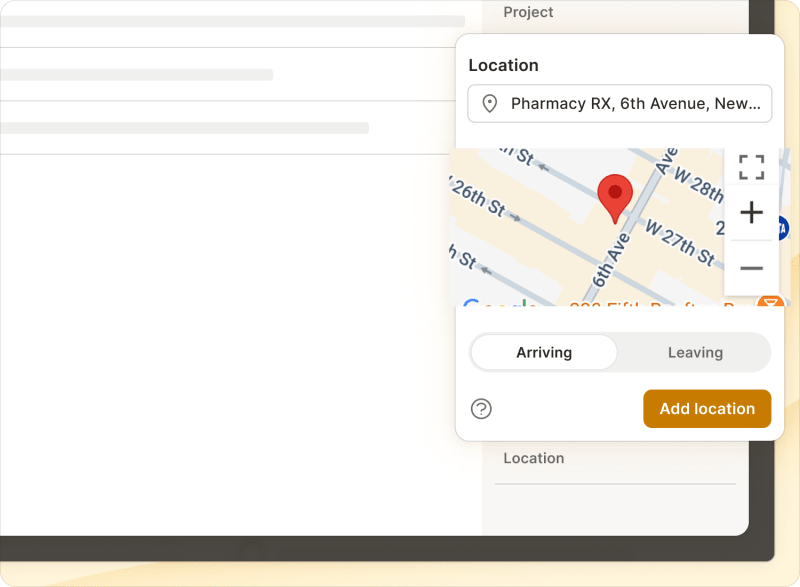
If you have the Todoist app on your mobile device, you can receive a location-based reminder and choose a specific location to trigger the reminder. You can opt to get a reminder as you’re arriving at or leaving from the location.
App callout note: Reminders are a paid feature in Todoist's...
6. Keep track of your tasks using the Inbox, Today, and Upcoming views
As you add and schedule more and more tasks, it gets harder to keep things organized and know what to work on first.
That’s why Todoist organizes your tasks into three useful views: Inbox, Today, and Upcoming.
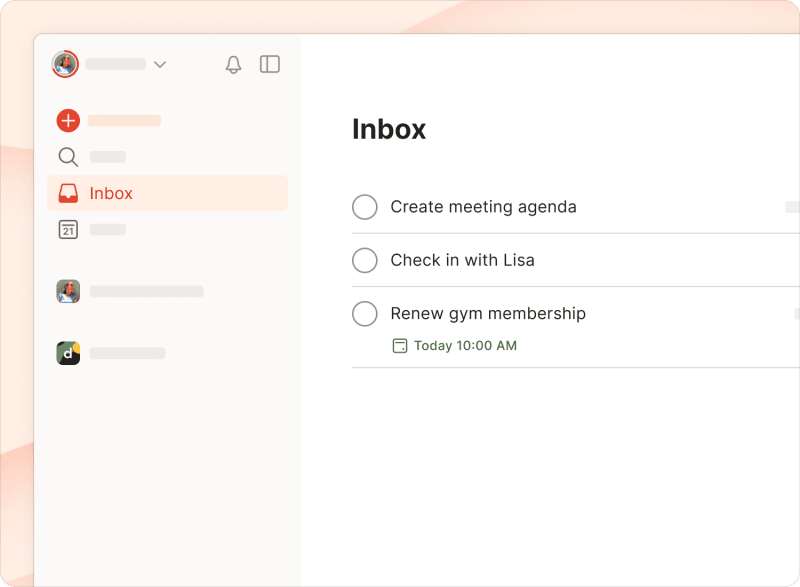
Inbox: The default home for new tasks
The Inbox is the catch-all for any new task you add to Todoist that you’re not sure where to organize. You can get the task out of your head quickly by adding it to the Inbox. Then, you can come back to either complete it right away or reorganize it into a new project for later.
Today: See every task that’s due today across all projects
Not sure what to work on next? Just open your Today view to see every task that has been scheduled for the day across all your projects. Keep completing tasks one by one, or postpone them if necessary, until you’ve reached Todoist Zero.
App callout note: 💡 Tip: Drag & drop to postpone
Upcoming: See every task due in your future
Get a bird’s eye view of all the tasks due in the next weeks, months, or years using the Upcoming view. You’ll see a day-by-day breakdown for every task that is coming your way. Plus, you can drag and drop tasks between days.
Drag and drop a task from Friday to Saturday to free up some time to relax.
App callout note: Upcoming tip
7. Use projects to organize bigger goals
A single task isn’t always enough. If you’re working on a team presentation at work or planning a multi-stop trip, you’ll need a project to keep track of all the details.
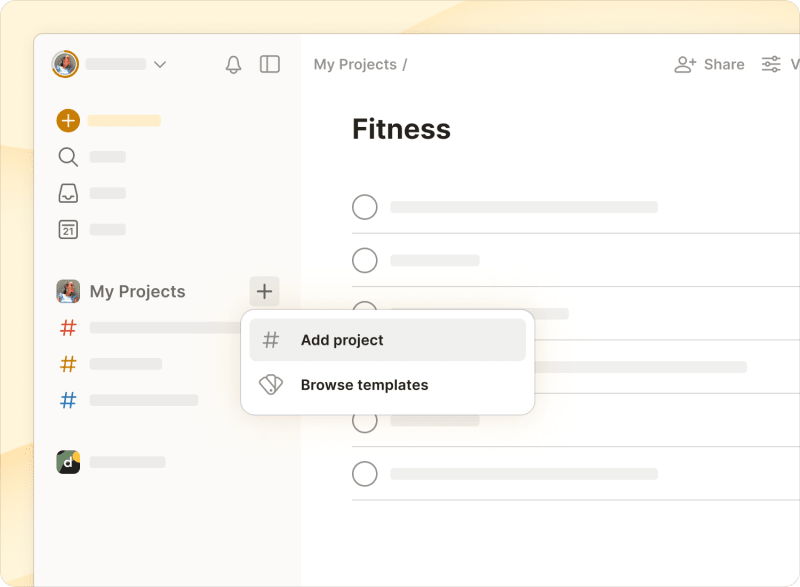
To create a project in Todoist, hover over Projects, click +, and select Add project (on Android/iOS, tap Browse and +).
Give your new project a name (maybe with an illustrative emoji ✈️). Optionally, assign it a color and add it to your list of favorites to make it easier to find. After clicking the Add button, select Add task to start listing out all the relevant steps along the way.
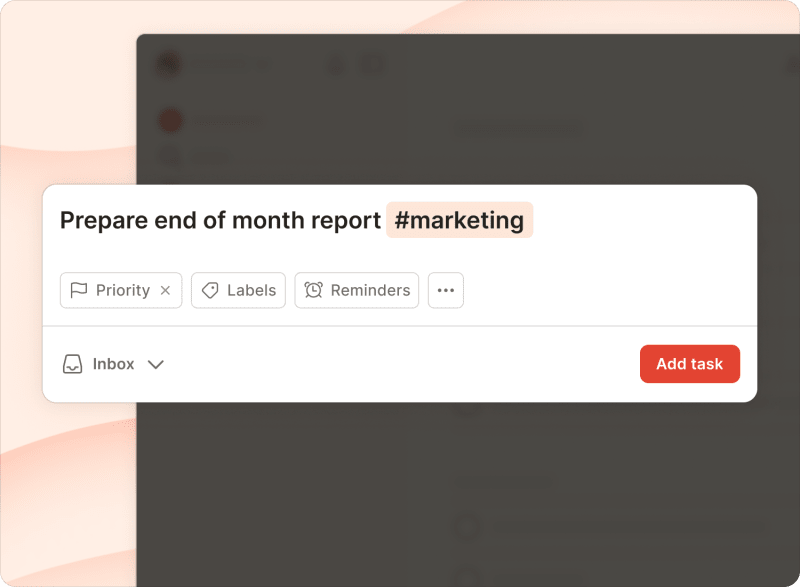
You can quickly assign a task to a project by typing # into the task field to pull up a list of all your existing projects. Continue typing the project name to narrow down the list.
Or click Inbox in the lower left corner of the task window to open your list of projects.
When should I use projects? 💡
Keep track of a side project
Create a concrete plan to achieve a goal
Save things to read or watch later
Share a to-do list with a loved one
Create a project and start a new adventure.
You don’t necessarily have to build projects from scratch. To replicate an existing project layout, use a template instead. We’ll cover project templates in depth below.
Organize your project into sections
Keep your project tidy by organizing tasks into sections and adding tasks underneath each.
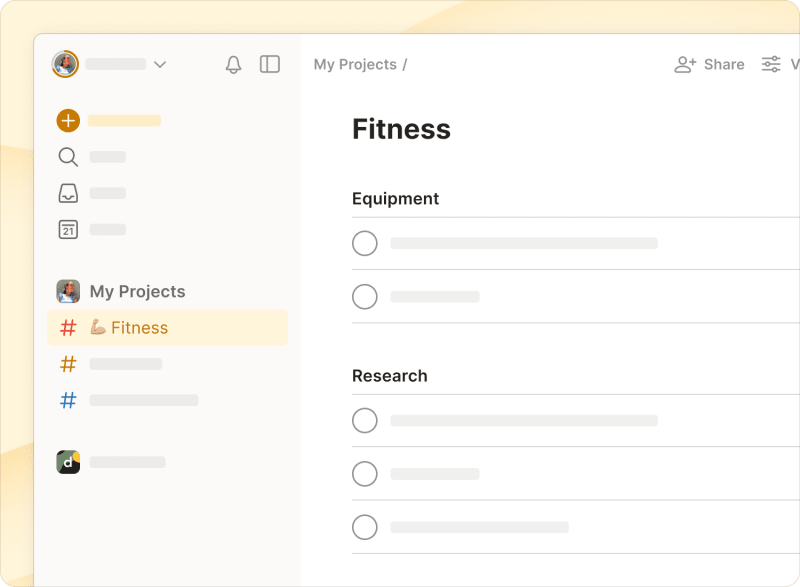
For instance, if you’re planning a project to run a marathon, you can have a section for tasks related to your Equipment (like buying new shoes and a tracksuit), your Training (like Run 5 miles tomorrow), and your Nutrition (like learning about different types of diets):
To create a new section, simply hover over the bottom of your task list to reveal the "Add section" action. You'll then have the option to add new tasks underneath the section or drag and drop existing tasks into it.
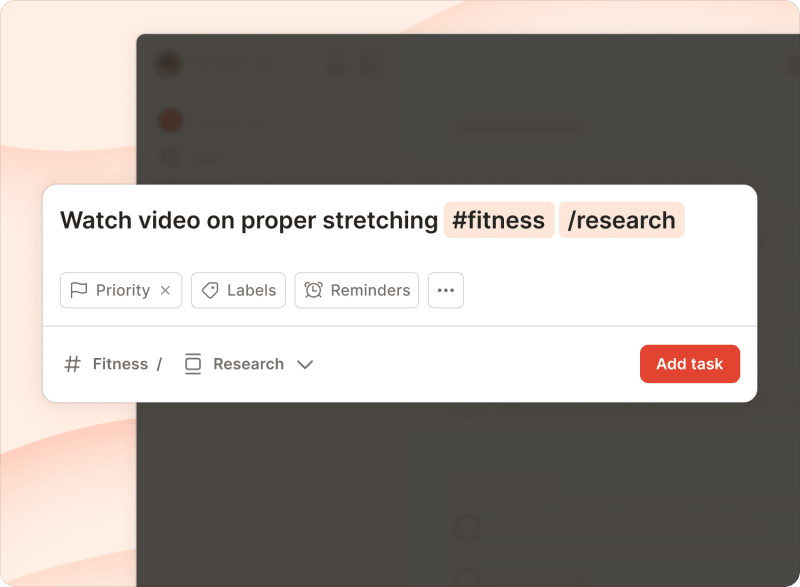
Quickly add a task to any section of any project by typing "/" in Quick Add or in the task editor, too. For example, typing “#Big Ideas /Work” will add your task to the Work section of your Big Ideas project. This same slash also works while searching for sections or even adding them to a filter (more on those later).
Finally, you can also click or tap on the gray arrow to the left of a section name to collapse or uncollapse the section, making it easy to focus on just one part of your project at a time.
Keep related projects together using sub-projects
Once you’ve been using Todoist for a while, your list of projects tends to grow.
First off, try to keep your projects to a minimum. You only have so much time and energy, and the more you can focus, the happier and more productive you’ll be.
But if you need the projects, keep it tidy using sub-projects. (Note: sub-projects are available for personal projects only. For team projects, use folders instead.)
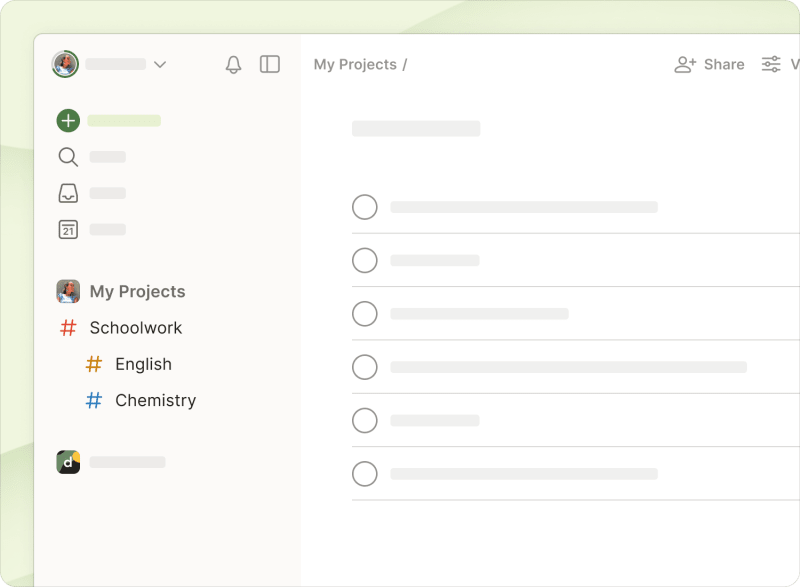
Let’s say you’re starting a new semester at school, and you want to keep all of your coursework in one easy to find place. Create a project for Schoolwork and projects for each course: Math, English, Chemistry, etc. Then drag and drop the courses underneath the Schoolwork project to turn them into sub-projects:
You can collapse your sub-projects underneath the parent project to hide them when you don’t need to see them by clicking on the arrow to the left of the parent project’s name.
App callout note: 💡 Tip: Project
8. Recreate frequently used projects with templates
Creating the optimal project structure for yourself or your team can feel like a big win. But having to recreate that same project (with every task, sub-task, and task attribute) each time you start something similar can feel like a waste of time.
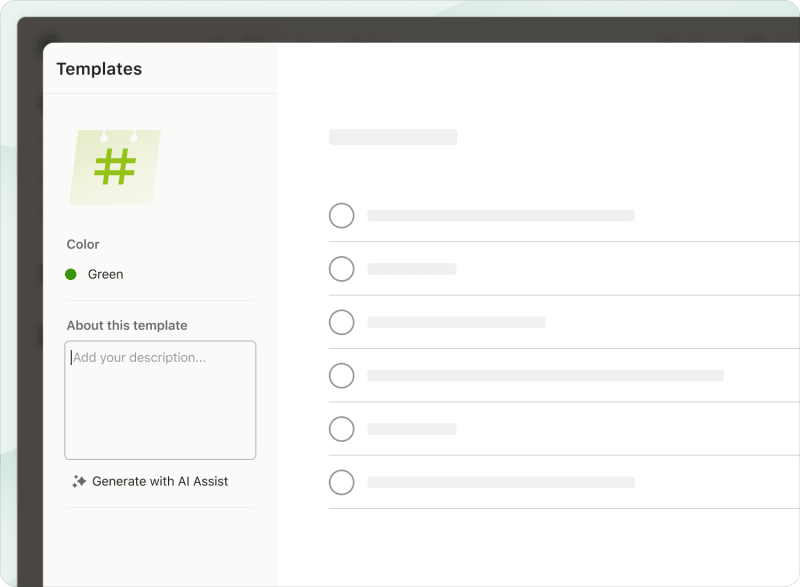
Instead of rebuilding a successful project from scratch, turn it into a template. Click the three dots icon next to any project you want to recreate and select Save as template from the menu.
Assign it a color and write a description. To create a description quickly, click Generate a description and hit Save.
The next time you want to create a similar project, click the plus sign next to your project list. Select Browse templates from the menu.
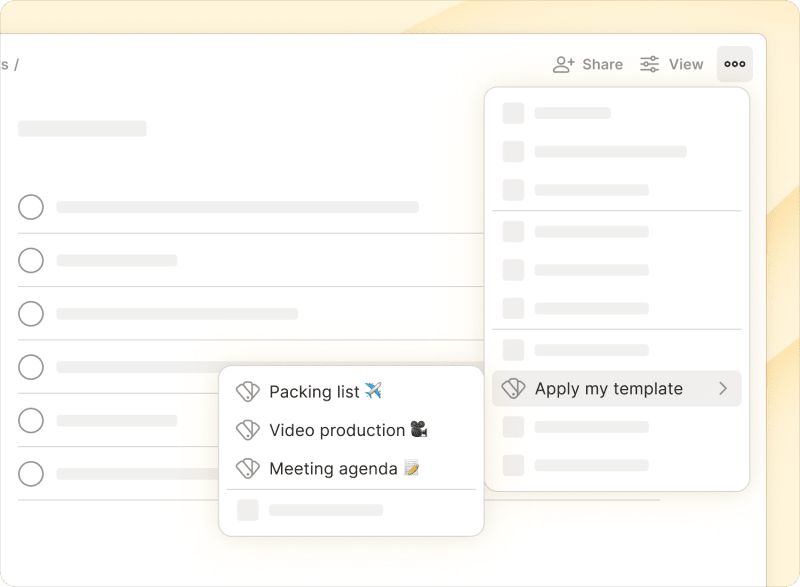
Alternatively, apply a template to a project you’ve already created. Click the three dots icon to open the project menu and select Apply my template. Then, choose a template from the list or click Browse my templates.
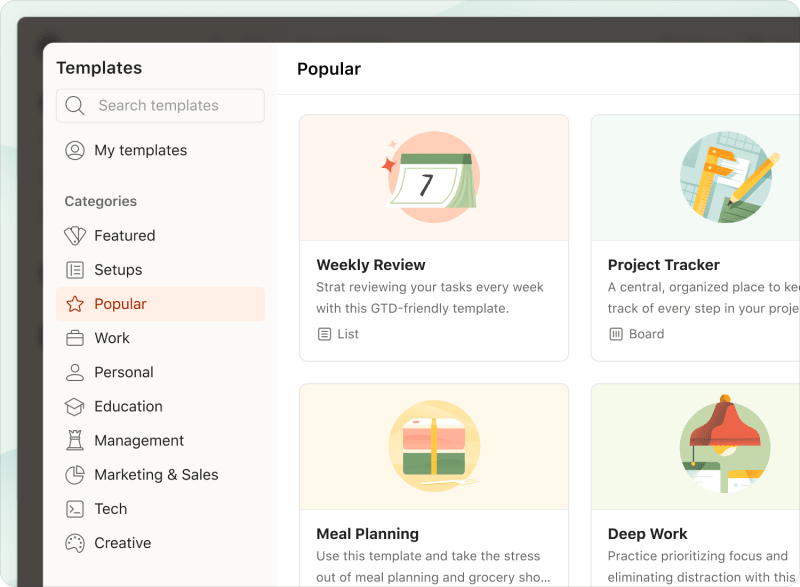
Save time with Todoist’s premade templates
Looking for inspiration? Instead of creating and reusing your own projects, try a premade template. Click Browse templates to see dozens of options everyone can use for projects like deep work and one-on-one meetings. You’ll also see templates for sales and marketing teams, product teams, customer support teams, and more.
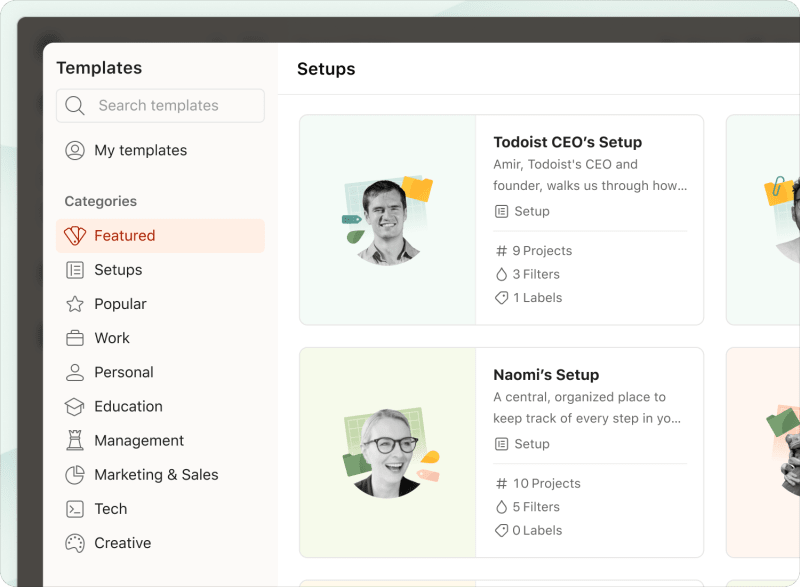
9. Use setups to get started quickly
Give your next project even more of a head start by using a Todoist setup. Think of it as a next-level template. Instead of a single project, it can include multiple project templates as well as filters and labels.
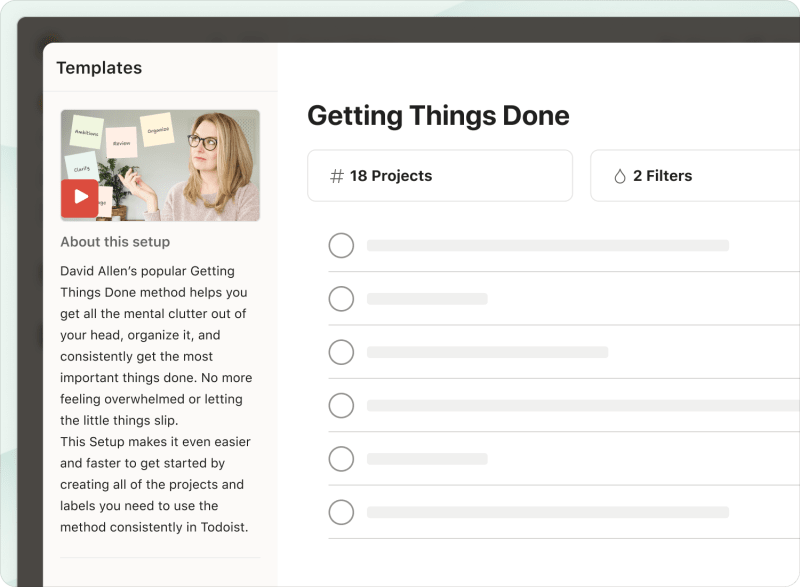
Want to clear your mind and be more productive? Try the Getting Things Done template, which walks you through establishing projects for areas of focus, weekly reviews, and much more.
Or try a setup designed (and used) by members of the Todoist team. For example, you can copy CEO Amir Salihefendić’s setup to get a glimpse of his personal productivity method, Systemist.
You’ll find all setups listed alongside templates. Click Browse templates to see the options and select the one that best fits your needs.
10. Plan your day, week, or month using a calendar layout
As helpful as a to-do list can be, it’s less ideal for visualizing how you’ll allot time during the day, week, or month. As a result, you might overextend yourself and plan more tasks than you can realistically tackle.
With a calendar layout, you can prevent scheduling conflicts and block time for tasks. From the month layout, click any day to add a task quickly.
With the week layout, you can get more granular. Add tasks with no specific time constraints by clicking All day. Or click the appropriate date and time on the calendar to add a timeboxed task.
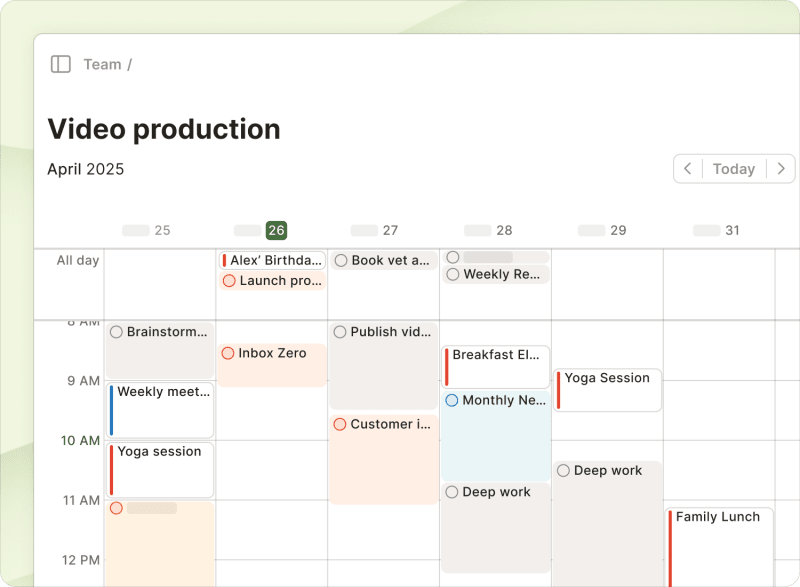
Want to schedule an all day task? Drag it to the calendar at the time you want to start. Then, extend the end time to create a sufficient time block.
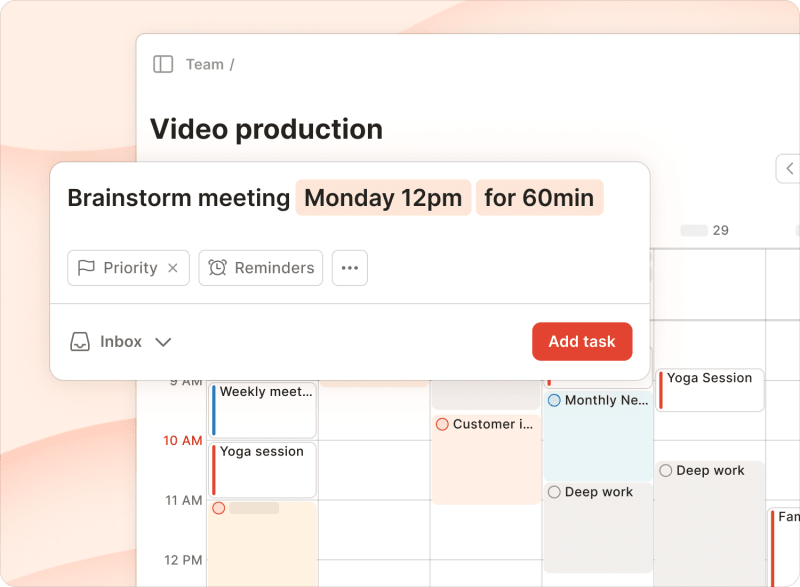
You can also create time blocks by adding details to the task name. Input the date, start time, and duration. The time block will automatically appear on your calendar.
Need to reschedule something? Drag tasks to new times or days as necessary.
Note: calendar layout is paid
11. Visualize your workflow with board, list, and calendar views
For some projects, a calendar view is helpful. But for others, a list view might allow you to get things done more efficiently. And for others still, a Kanban board view might be essential for visualizing project stages.
There’s no need to use the same view throughout Todoist. Instead, you can select a different view for each project as well as to Today and Upcoming. Just open the options menu and select the view you want to apply.
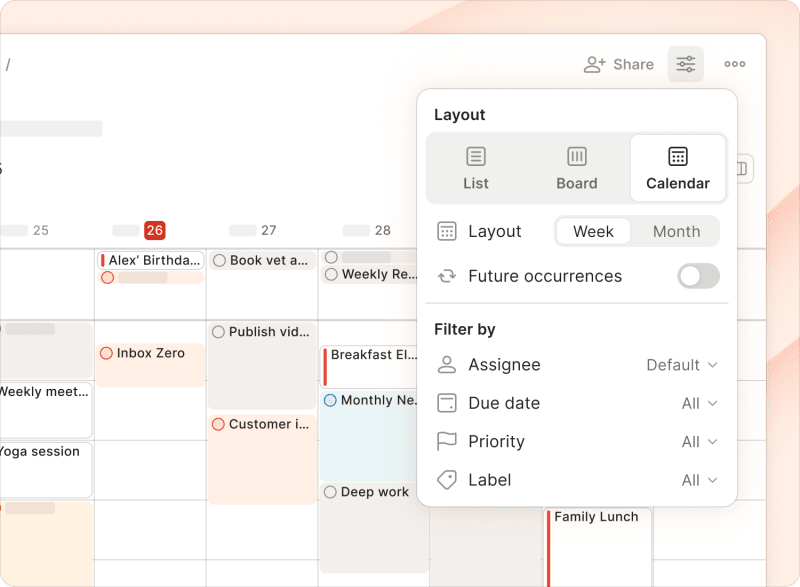
Switch to another view at any time to plan and work more efficiently.
12. Stay on top of a busy schedule by syncing your tasks with your calendar
A calendar is a great way to get a big picture view of your day-to-day, hour-to-hour work. Keep your calendar synced up with your tasks using Todoist’s calendar feeds and integrations and you’ll never miss a thing.
You can choose to see all your Todoist tasks in your calendar or only tasks from a specific project.
Add and edit Todoist tasks from Outlook or Google Calendar
If you’re using Outlook or Google Calendar, you can add and edit tasks directly from your calendar and have those changes reflected back in Todoist using two-way sync. Learn more about the Calendar integration
Add a new event to your synced Outlook or Google Calendar and it will appear in Todoist. For example, this integration can instantly add any calls or meetings booked via your calendar to Todoist.
13. Upload files and add information to tasks
When you’re busy, you don’t want to waste time searching for files and information related to your tasks. Get in the habit of attaching related notes and files to each of your tasks. For example:
If you’re traveling, add a comment to your travel task with the address and a link to the map.
If you’re submitting a report, attach the working document to the task.
If you’re working on a design, add a comment with your latest mockups.
If you’re working with a team on a presentation, attach the slide deck so everyone can discuss it in the comments.
If you need to share feedback, record a voice note.

To add a comment or upload a file, hover over a task on the web (or tap a task on Todoist mobile) and click the speech bubble icon to open the comment view. Then drag and drop your file into the input box, type out your comment, and/or record a voice note.
App callout note: 💡 Tip: Project comments
14. Work together by sharing your tasks and projects
Delegate tasks to teammates so each person can focus on their area of expertise.
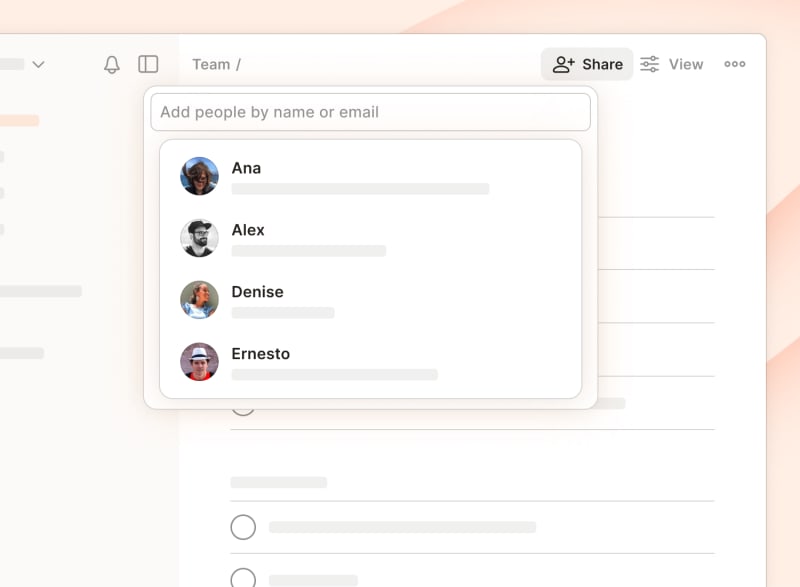
Completing tasks gets easier when you don’t have to do all the work yourself. Whether you’re delegating family errands or coordinating a project with your team, Todoist’s shared projects make it easy to collaborate with others by keeping tasks, due dates, comments, and files organized in a single place everyone can access.
To share a project on Web, macOS, or Windows, open the project you want to collaborate on and click Share. To share on Android or iOS, open the project you want to share and tap the person icon in the upper right corner. Then invite everyone using their email addresses.
Delegate work by assigning tasks to others
You’ve shared your project with everyone, now what? Figure out who’s doing what and assign tasks to people.
To assign a work task to someone in a shared project, click on the grey person icon to the right of a task (Web, macOS, Windows) or below a task (iOS, Android) and choose a name from the list of everyone in the project.

Steve Jobs believed that only one person should be responsible to get things done and called his approach the Direct Responsible Individual. Accordingly, you can only assign a task to one person in Todoist. If you have a task that needs to be completed by multiple people — like asking your team to submit their expense reports — duplicate the task for each respective team member.
Assigning a single person
Discuss and share information in comments
In shared projects, comments become an essential, collaborative space to discuss task details, share files, and keep relevant information organized. You can specify who to notify about a comment and they’ll receive it in their notifications.
Tip: comment when assigning
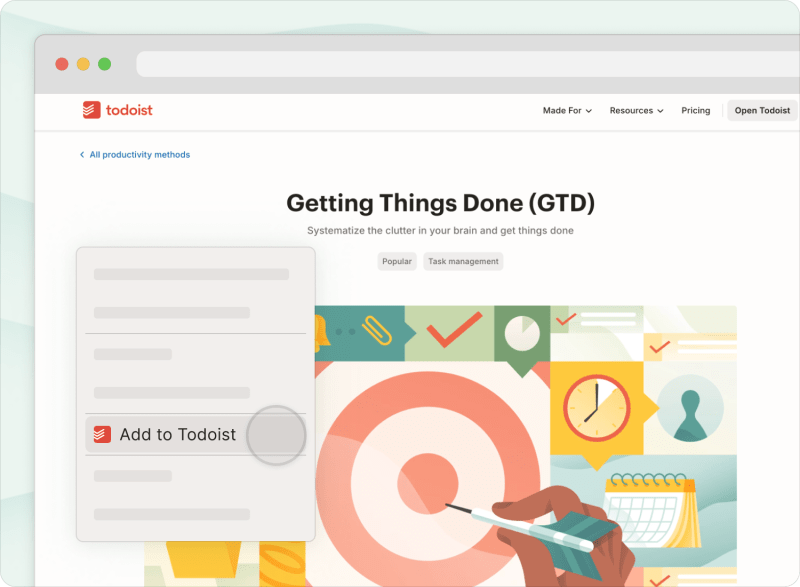
15. Add websites as tasks using browser extensions
When you’re browsing the web, you don’t always have time to read things right away. Save things to read (or buy) later by saving web pages as tasks in Todoist with browser extensions for Chrome, Firefox, and Safari.
Here’s how it works:
Download the extension of your choice (you’ll see a Todoist icon in the top right-hand corner of your browser window when it’s installed).
While browsing the web page you want to add to Todoist, right click and choose Add to Todoist.
A new task will be created linking back to the web page. Later, simply click the task name to revisit the page.
App callout note: 💡 Tip: You can add a webpage
Save websites as tasks from mobile
On iOS and Android, you can use your browser’s share option to save pages as Todoist tasks, too. Just find the Share option in your browser app and select Todoist’s Add as task action.
16. Add emails as tasks using plugins and forwarding
You can’t respond to every email right away. That’s why your Inbox keeps piling up. But at some point, you forget to follow up on important emails. Let Todoist help you remember what needs a response by saving your important emails as tasks without leaving your email client.
Todoist integrates with Gmail and Outlook. By installing the Gmail and Outlook email plugins, you can add an email to Todoist with a few clicks:
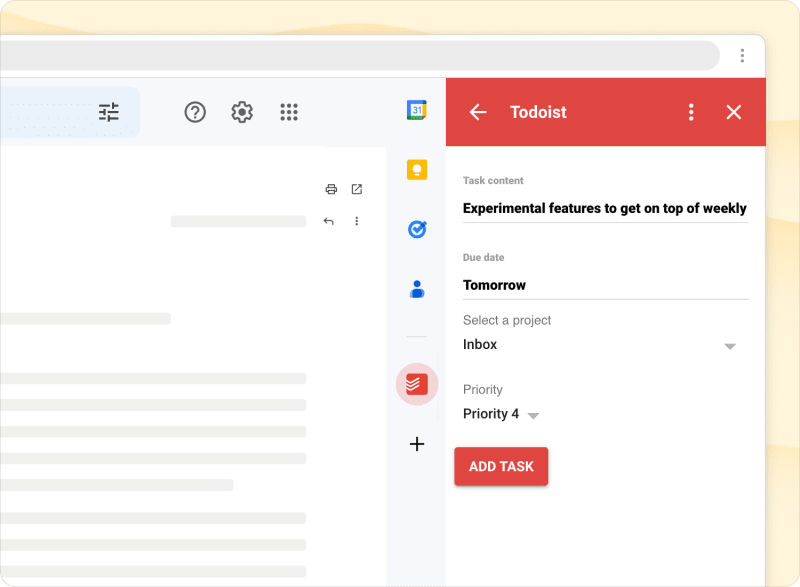
While you’re in your email client, click the Todoist icon at the top. A window will pop up at the bottom of the screen, creating a new task that uses the email as the subject line.
To save the task as-is, click Add task. You can also select a due date and priority level, choose a project and label, set a reminder, and assign the task before saving it.
Either way, the new task automatically includes a link back to the email. So when you go to complete the task later, you can easily access all the information you need without having to search through your email.
App callout note: 💡 Tip: You can see your tasks
Forward your emails to Todoist
Don’t use Outlook or Gmail? No worries. Forward your emails to Todoist to add them as tasks.
Here’s how to set it up:
Open Todoist on Web, macOS, or Windows.
Open the project you want to email your tasks to.
Click the three dots icon.
Select Email tasks to this project.
Click Copy email to copy the email address provided.
Go back to your email client and forward any email to that address.
A task will appear in Todoist with the email subject as the task name and the body of the email in the task’s comments. You can also add details like priority levels, due dates, and labels from your email client. Add any of these details above your email signature before forwarding.
If you want to attach an email to an existing task, you can also forward emails directly into task comments. To get the comment forwarding email address, open up task view, click the three dots icon, and select Add comments via email.
Tip: Inbox Zero Todoist
17. Tag and organize your tasks using labels
Sometimes you’ll want to see certain types of tasks even if they’re scattered across different projects. You can do this by assigning a label to all related tasks.
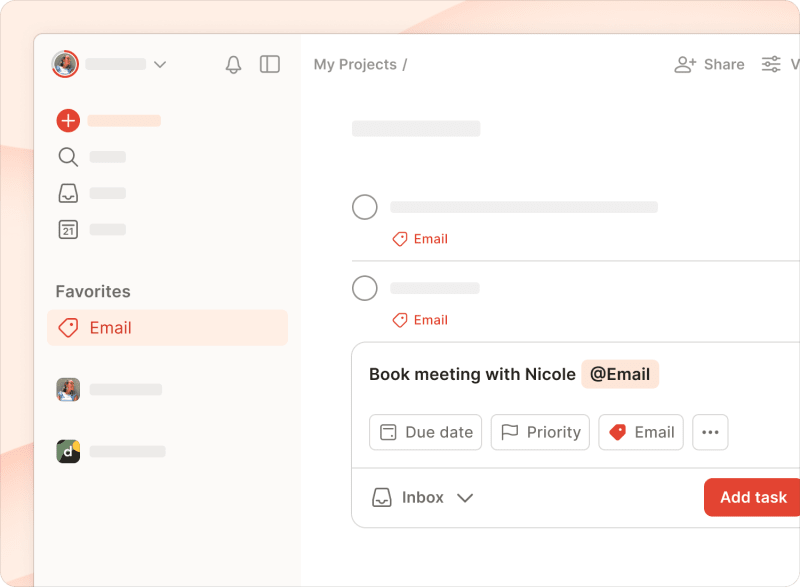
For instance, you might want to see every email related task in one list. Simply tag each task with a label like @email and you can pull them all up whenever you need to:
Here are a few ways that you can use labels:
To keep track of how long your tasks will take, use labels like @5_minutes, @15_minutes, and @30_minutes. That way when you have just 5 minutes to spare, you can pull up your @5_minutes label so you won’t waste any time.
If you’re waiting on someone to finish a task, use the @waiting label so you know it doesn’t need any action until the person gets back to you. If you don’t hear back, you can pull up your @waiting list and quickly follow up with the people you’re waiting for.
To add a label, simply type out @ when adding or editing the task. You’ll see a list of available labels and you can pick one or type out a new label name.
Add a label to a task to group it with other related tasks.
To view a label’s tasks, open the Labels dropdown in your navigation pane and find the label you’re after. Or simply type the label, like @shopping, into your search bar.
18. Find the right tasks using search and filters
As your Todoist fills up with tasks, you’ll want to see tasks that match certain criteria, like every task with the word “Presentation” or every task due in the next 30 days.
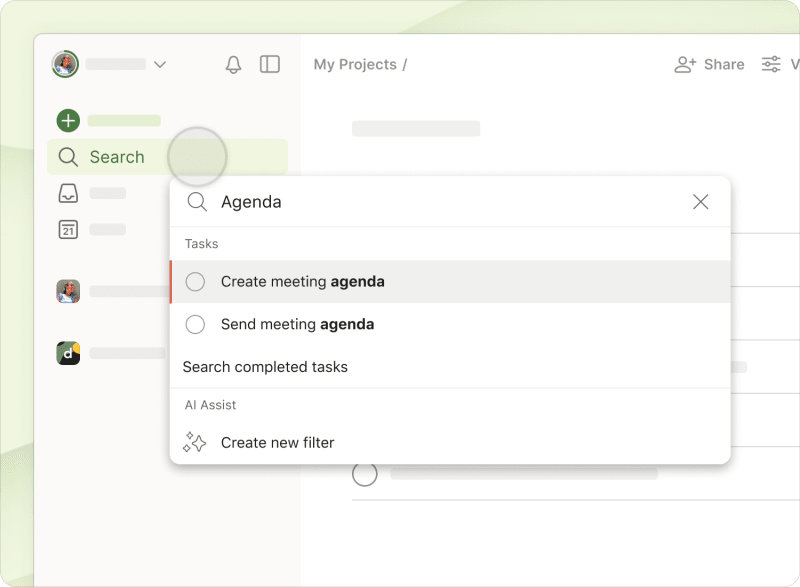
Find any task, comment, project or label fast with Search
The fastest way to find a specific task, comment, project, or label is with Search. Simply click or tap Search and type out the keyword you’re looking for. You’ll see a list of every task, comment, project, and label containing that keyword.
Filter your tasks to see exactly what you want
The default task views that Todoist provides — Inbox, Today, Upcoming, projects — may not always be enough. For example, you might want to see every task due in the next 30 days, or tasks that don’t have a due date, or every task assigned to you.
That’s where filters come in handy.
Filters are custom views of your tasks and projects based on whatever criteria you like. For instance, you could have a filter that only shows:
Tasks due in the next 14 days.
Tasks in your #Work project that are due today.
Tasks due this week that are Priority 1.
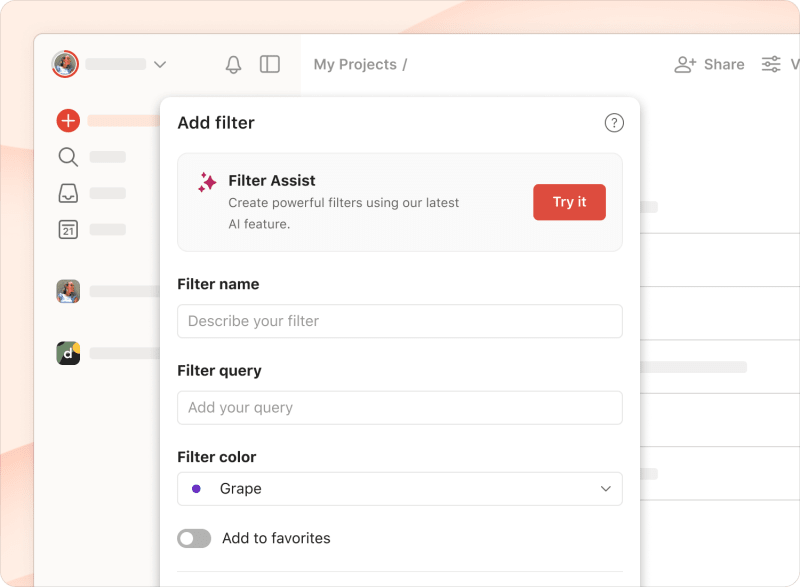
Once you know which tasks you want to see, create a filter so you can easily come back to the same view later. Start by clicking the + symbol next to Filters in the menu. Type out your filter name, add a filter query that specifies what you need. Here are a few examples:
30 days will show you tasks due in the next 30 days.
assigned to: Jennifer will show you tasks assigned to Jennifer.
No date will show you tasks without a due date.
You can also combine two or more criteria in your filter. For example:
Today & #Work will show tasks due today that are also in your #Work project.
7 days & p1 will show you tasks due this week that are also priority 1.
Assigned to:Jack & 30 days & #Work will show you tasks that are assigned to Jack, have a due date in the next 30 days and are in the #Work project.
Once you’ve typed in your query, tap or click on Add to save it. To see its tasks, click or tap the Filters dropdown in your navigation pane and then click or tap on the filter you’re looking for. As you add tasks that match the filter query, the filter is automatically updated.
Use Filter Assist to create filters using plain language
Click or tap to create a new filter. Hit the Try it button at the top of the panel to use Filter Assist. Then, use natural language to describe what you want to filter.
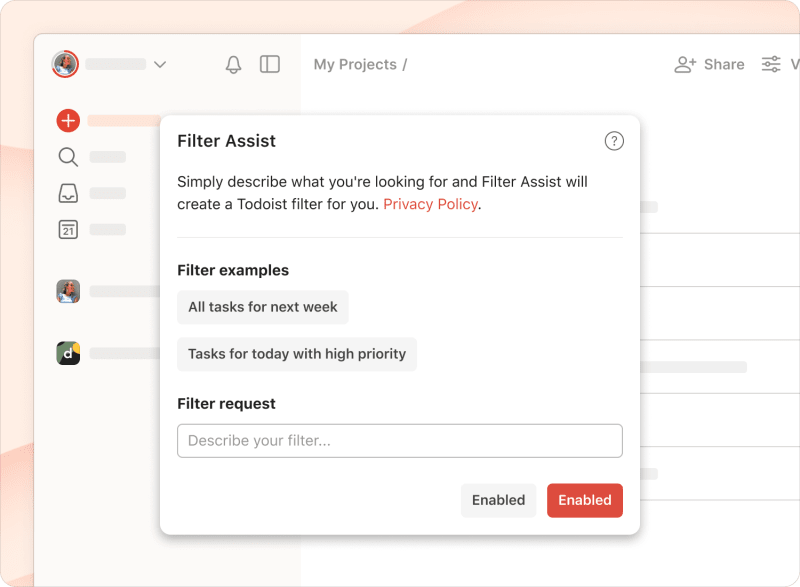
You’ll have a chance to review and edit the filter before saving it.
For more example queries and everything you need to know about filters, check our help center.
19. Pin your important projects, labels, or filters to favorites
If you have a project, label, or filter that‘s particularly important to your workflow, keep it beside you at all times by saving it to your favorites. Favorited items will always be visible on your navigation pane to the left, right below Upcoming.
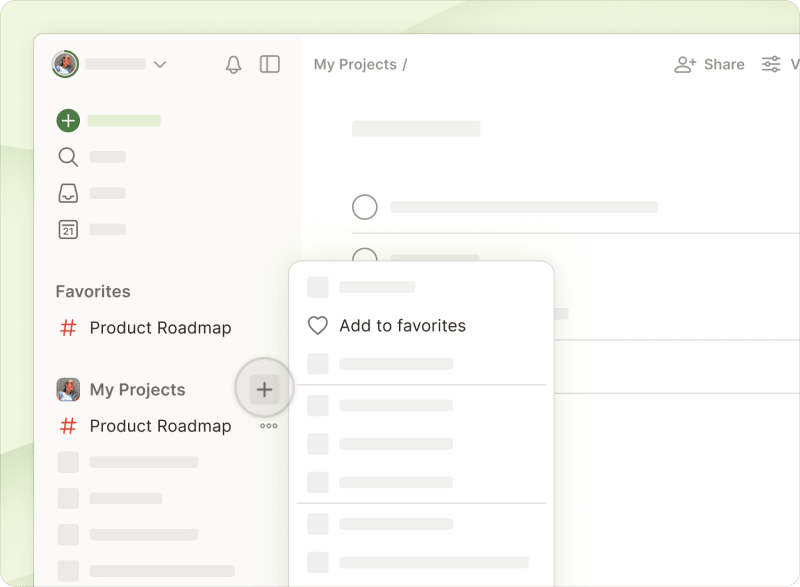
Your favorites follow you everywhere you use Todoist, your phone, your tablet, your computer, your watch, and wherever, so you’ll always have quick access to what you need.
20. Review your progress using the Productivity view
How productive are you really? Use the Productivity view to see how many tasks you’ve completed this week and how much progress you’ve made towards your daily and weekly goals.
You can set productivity goals for yourself by going to Settings > Productivity. Input the number of daily or weekly tasks you want to complete. Don’t forget to mark your days off so your productivity streaks won’t be broken.
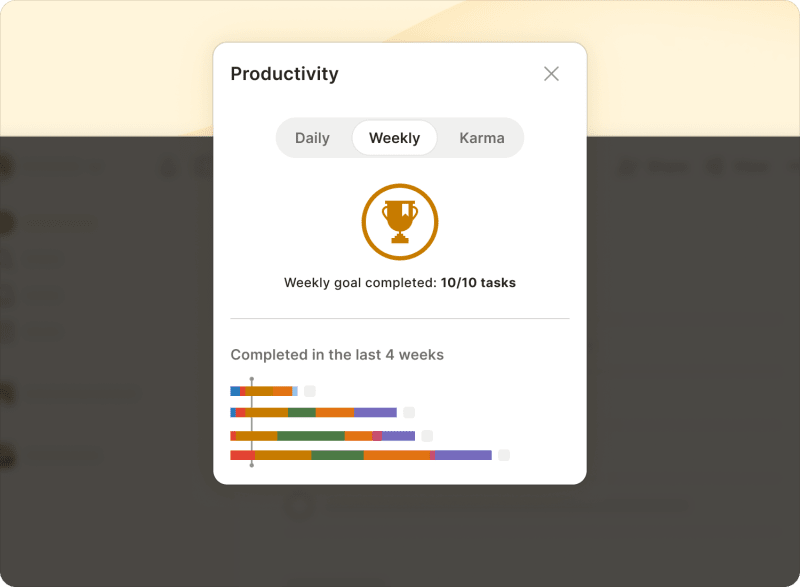
Start by setting daily or weekly task goals and see how well you do for a week or a month. Try to hit your goal multiple days and weeks in a row and build up a streak — then keep that streak going for as long as you can (and be more and more productive along the way).
Tip: vacation mode
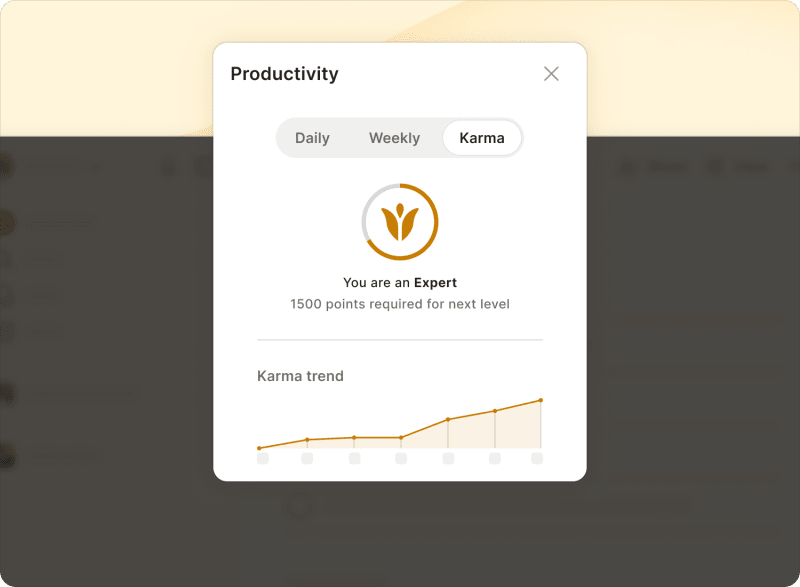
21. Stay motivated using Karma points
Karma points are awarded to you as you complete tasks in Todoist. They’re the yin and yang of productivity: A little recognition for completing your tasks and a push to keep going and not break your streak. As you gain points, you’ll earn higher Karma levels and maybe one day join the ranks of the Todoist Enlightened. 😇
Tip: Turn Karma off
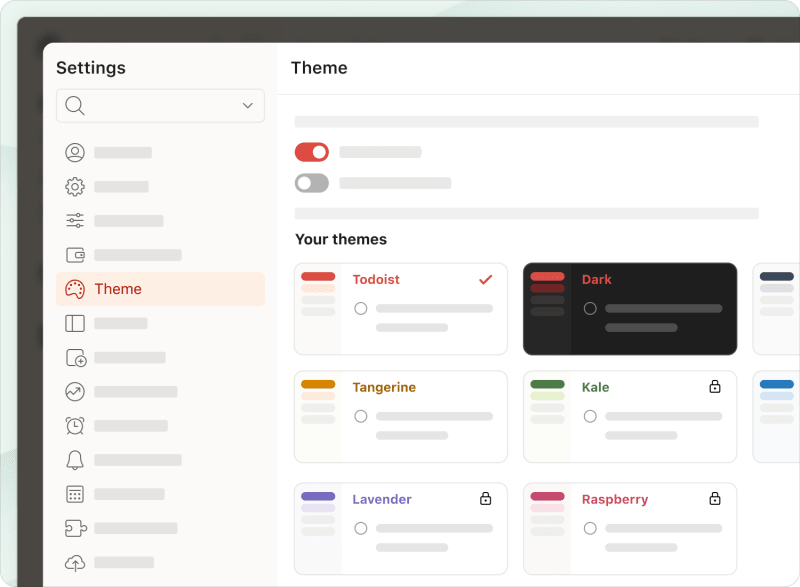
22. Customize your Todoist with colorful themes
Take a page from organizational guru Marie Kondo and make your Todoist a space that inspires you by draping it in color. Pick a theme from Tangerine to Moonstone in Todoist from Settings > Theme. Your theme will sync across every device you use.
If you’re a night owl or the type that likes to keep the lights down, try the Dark theme:
Tip: color of todoist
23. Integrate Todoist with all your apps
Sometimes it can feel like your life is scattered across a bunch of apps and it’s hard to get a pulse on everything that’s going on.
Make Todoist your central hub by pulling info from your various apps so you can check in on everything at a glance. There are over 100 Todoist integrations that let you do things like:
Create, assign, and complete tasks directly from Slack or Microsoft Teams.
Pull information from hundreds of apps into Todoist using your favorite Zapier Zap or IFTTT Applets.
Get smart support from the Task Assist integration to break down complex work and transform goals into actionable steps.
You now have a complete list of ways to capture and organize your tasks with Todoist, but the true key to productivity is building a simple and sustainable system you can trust. Keep at it, and maybe some of these features will become stepping stones that lead you towards your optimal personal productivity system, whether that’s an all-encompassing workflow or just a few simple rules to stay organized.
Neil Vidyarthi
Neil Vidyarthi is a product marketer and mindfulness evangelist at Doist.