Been putting off writing your quarterly sales report, or studying for next week’s test? Break these large tasks into bite-sized chunks with sub-tasks. Create, assign, and schedule sub-tasks in Todoist, so you can plan when and how to get the job done. You’ll be surprised how quickly you’re able to reduce overwhelm, and finally make progress.
Add a sub-task
Let’s start by creating your first sub-task:
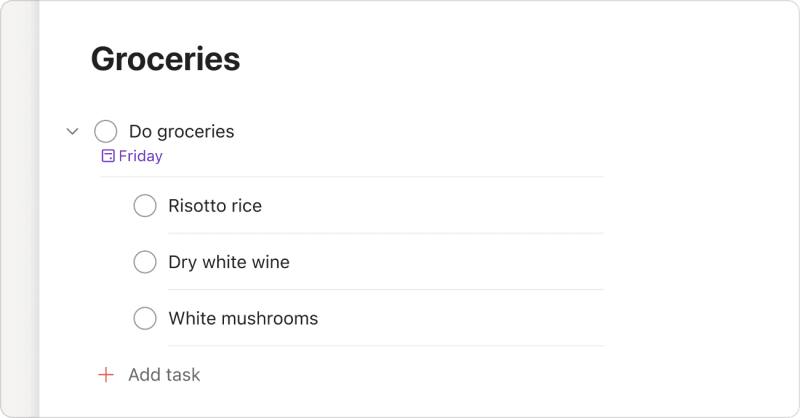
- Click the task you want to add a sub-task to. This will open task view.
- Select Add sub-task.
- Enter the task's name and any details you want to add.
- Click Add task or press Enter to save the task.
Use the task view
- Tap a task. This opens the task view.
- Tap Add Sub-task.
- Enter the task name and any details you want to add.
- Tap the submit button.
Use the Dynamic Add Button
- Drag the Dynamic Add button below the task, moving it slightly to the right.
- Enter the task name and any details you want to add.
- Tap the submit button.
Use the task view
- Tap a task. This opens the task view.
- Tap Add sub-task.
- Enter the task name and any details you want to add.
- Tap the submit button.
Use the Dynamic Add Button
- Drag the Dynamic Add button below the task, moving it slightly to the right.
- Enter the task name and any details you want to add.
- Tap the submit button.
Marija · Customer Experience Specialist
Edit a sub-task
You may need to add more context or change a few details about the sub-task, especially if you’re working with others. Here’s how to edit a sub-task:
- Click the parent task. This opens the task view.
- Click the Edit task icon beside the sub-task name.
- Make the changes you need to the task.
- Click Save to confirm.
- Tap the parent task. This opens the task view.
- Tap the sub-task.
- Tap the three dots icon at the top-right.
- Select Edit Task.
- Make the changes you need to the task.
- Tap the checkmark icon to confirm.
- Tap the parent task. This opens the task view.
- Tap the sub-task.
- Tap the three dots icon at the top-right.
- Select Edit task.
- Make the changes you need to the task.
- Tap Save to confirm.
Note
Copy a sub-task link
You may need to copy a sub-task link for your own reference, or share a sub-task with someone you’re collaborating with. Here’s how to copy a sub-task link:
- Click a sub-task. This opens the task view.
- Click the three dots icon at the top-right.
- Select Copy link to task.
The sub-task link is copied to your clipboard automatically.
Quick tip
- Tap a sub-task. This opens the task view.
- Tap the three dots icon at the top-right.
- Select Copy Link to Task.
The sub-task link is copied to your clipboard automatically.
- Tap a sub-task. This opens the task view.
- Tap the three dots icon at the top-right.
- Select Copy link to task.
The sub-task link is copied to your clipboard automatically.
Duplicate a sub-task
If multiple people are working on the same sub-task, you can quickly duplicate a sub-task to avoid writing each copy from scratch. The duplicates, however, won’t include comments, attachments, or custom reminders of the original sub-task. If there's information to retain, add it to the task description before duplicating it.
- Click the parent task. This opens the task view.
- Click the three dots icon to the right of the sub-task name.
- Select Duplicate.
The duplicate will appear below the original sub-task in the list.
Duplicate two or more sub-tasks
If you need to duplicate two or more sub-tasks, press and hold the Shift ⇧ key as you click the first and last sub-task in the list. This selects all the sub-tasks in the list, and displays the multi-select toolbar at the bottom. Click the three dots icon and select Duplicate.
- Tap the sub-task. This opens the task view.
- Tap the three dots icon at the top-right.
- Select Duplicate Task.
The duplicate will appear below the original sub-task in the list.
Duplicate two or more sub-tasks
- Check if the project is using the list layout.
- Swipe right on a sub-task to select it.
- Tap the rest of the sub-tasks below it. The selects all the sub-tasks and displays the multi-select toolbar at the bottom.
- Tap the three dots icon.
- Select
Duplicate X Tasks where
Xis the number of selected tasks.
- Tap the sub-task. This opens the task view.
- Tap the three dots icon at the top-right.
- Select Duplicate task.
The duplicate will appear below the original sub-task in the list.
Duplicate two or more sub-tasks
- Check if the project is using the list layout.
- Swipe right on a sub-task to select it.
- Tap the rest of the sub-tasks below it. This selects all the sub-tasks and displays the multi-select toolbar at the bottom.
- Tap the three dots icon.
- Select
Duplicate X tasks where
Xis the number of selected tasks.
Quick tip
Turn an existing task into a sub-task
Both tasks must be in the same project. If the task you want to nest is in a different project, move it first using the three-dot menu. You also need to turn off any sorting applied to the project before you can drag to indent.
Drag the sub-task
- Hover your cursor over a task.
- Click and hold the drag handle beside the task.
- Drag it from left to right to adjust its sub-task level.
Use keyboard shortcuts
- Open a project and check if it's using the list layout.
- Use J or K, or the Up ↑ or Down ↓ keys, to select a task.
- Use Control ⌃ + close bracket ] to increase the indent and turn the task into a sub-task.
- Touch and hold a task.
- Drag left to right to adjust its sub-task level.
Note
Todoist supports four indent levels. For example, a sub-task is using indent level 1 and a sub-sub-sub-sub-task is using indent level 4.
You can't change the indent of a task when working in the task view or when sorting is applied to the project. You can, however, manually drag the sub-tasks to rearrange them in the task view.
Turn a sub-task into a parent task
Drag the sub-task
- Hover your cursor over a sub-task.
- Click and hold the drag handle beside the task.
- Drag the sub-task above or below its parent task, and to the left of the task list.
Use keyboard shortcuts
- Open a project and check if it's using the list layout.
- Use J or K, or the Up ↑ or Down ↓ keys, to select a sub-task.
- Use Control ⌃ + open bracket [ to decrease the indent and turn it into a parent task.
Move to the same project
- Open a parent task.
- Click the three dots icon beside a sub-task.
- Click Move to... and select its own project.
The sub-task will move out of the parent task and appear at the bottom of the list.
- Touch and hold a task.
- Drag left to right to adjust its sub-task level.
View completed sub-tasks
You can see a task's completed sub-tasks when using the task view. Click a parent task to open the task view, and click Show completed.
- Tap a parent task. This opens the task view.
- Tap the three dots icon at the top-right.
- Select Show Completed Sub-tasks.
- Tap a parent task. This opens the task view.
- Tap the three dots icon at the top-right.
- Select Show completed sub-tasks.
Un-complete a sub-task
If you accidentally completed a sub-task, here’s how to un-complete it and bring it back to the task list:
- Click a parent task. This opens the task view.
- Click Show completed. A list of completed sub-tasks will appear.
- Click the check icon beside the completed sub-task.
- Tap a parent task. This opens the task view.
- Tap the three dots icon at the top-right.
- Select Show Completed Sub-tasks.
- Tap the check icon beside the completed sub-task.
- Tap a parent task. This opens the task view.
- Tap the three dots icon at the top-right.
- Select Show completed sub-tasks.
- Tap the check icon beside the completed sub-task.
Delete a sub-task
If you no longer need a sub-task, you can delete it from the parent task list. Once it’s deleted, you can no longer restore it.
- Click the parent task. This opens the task view.
- Click the three dots icon to the right of the sub-task name.
- Select Delete.
Delete two or more sub-tasks
If you need to delete two or more sub-tasks, press and hold the Shift ⇧ key as you click the first and last sub-task in the list. This selects all the sub-tasks in the list, and displays the multi-select toolbar at the bottom. Click the three dots icon and select Delete.
- Tap the sub-task. This opens the task view.
- Tap the three dots icon at the top-right.
- Select Delete Task.
Delete two or more sub-tasks
- Check if the project is using the list layout.
- Swipe right on a sub-task to select it.
- Tap the rest of the sub-tasks below it. The selects all the sub-tasks and displays the multi-select toolbar at the bottom.
- Tap the three dots icon.
- Select
Delete X Tasks where
Xis the number of selected tasks.
- Tap the sub-task. This opens the task view.
- Tap the three dots icon at the top-right.
- Select Delete task.
Delete two or more sub-tasks
- Check if the project is using the list layout.
- Swipe right on a sub-task to select it.
- Tap the rest of the sub-tasks below it. The selects all the sub-tasks and displays the multi-select toolbar at the bottom.
- Tap the three dots icon.
- Select
Delete X tasks where
Xis the number of selected tasks.
Best practices for sub-tasks
Sub-tasks can turn large, overwhelming tasks into easy, digestible parts. We’ve rounded up some best practices that’ll help you make the most out of sub-tasks in Todoist:
Think of sub-tasks as the steps to complete the parent task
If the goal is to finish writing your quarterly sales report, create sub-tasks for each section of the report: introduction, data presentation, interpretation, and actionables.
Assign sub-tasks to your delegates
If you’re collaborating with others on a large task, you can create sub-tasks that describe each person’s core task or focus. Then, assign it to who you’re delegating that sub-task to, so each person knows exactly what they’re supposed to work on.
Assign reminders to sub-tasks
Make sure everyone’s up to speed with their deadlines by creating and assigning custom reminders to the right people. This ensures nothing slips through the cracks, especially when deadlines are coming up!
Add dates to all the sub-tasks
Schedule each sub-task with its own date, all of which lead up to when the report’s due for submission. If you’ve upgraded to a paid plan, you can use the Week or Month views of the calendar layout to check when a sub-task is due, and how long it’ll take to complete each sub-task.
Keep sub-task order in mind
Todoist does not preserve the original sub-task order when you complete a recurring parent task and reset its sub-tasks, or when you complete and then uncomplete a sub-task. You can manually rearrange them by dragging the sub-tasks back into place.
Get in touch
If you’re having trouble creating sub-tasks, or turning existing tasks into sub-tasks and vice versa, get in touch with us.